Real estate photo editing is almost as important as taking the photos themselves. The transformation of the raw images into photos that display a home’s perfections is a simple process with small changes to enhance a photo. These little touch-ups help to demonstrate the quality of a home and the quality of a picture. Here are some tips to help better your real estate photo editing.
Know Your Background
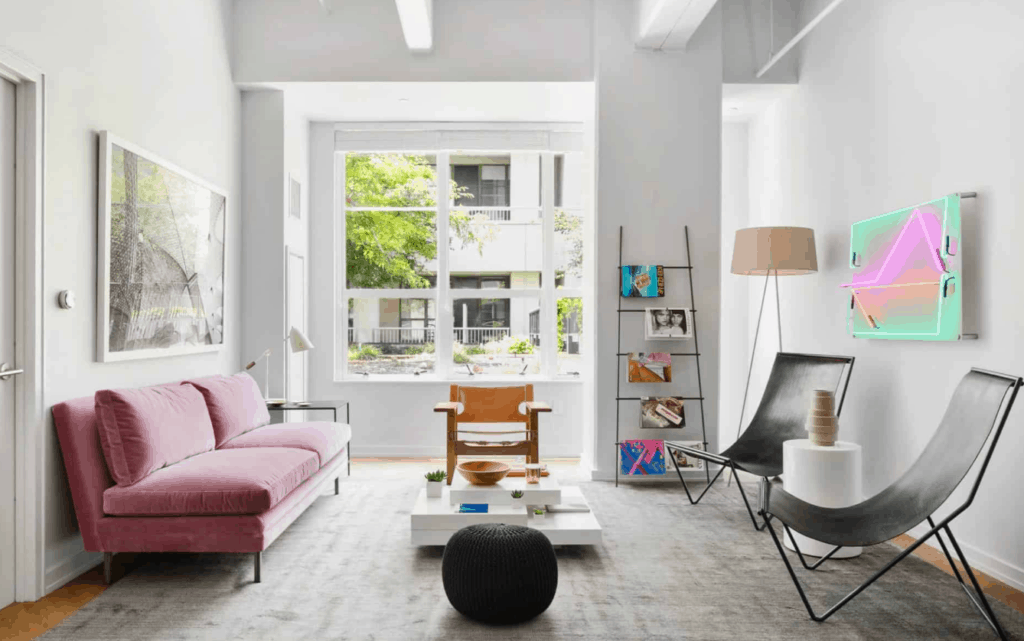
The foreground of an image is only as good as its background. The background of a space accents the entirety of a room; this can, of course, be anything from a painted wall to a full-length window frame. In real estate photography editing, all aspects of an image should be taken into account to make an image look its best.
When working with windows that show a view into the outside of a property, an editor should learn to properly accent the saturation of the exterior and the sky’s look. The light that enters the room should also work with the layout, the furniture, and the room’s accent pieces.
The most significant focus in working with the backgrounds or an exterior view of a home is to make sure that what you edit looks realistic.
Color Correction, Saturation, and Exposure
Every room in every home varies in lighting and color, so working with color correction in real estate photo editing services is essential. Start by first working with the exposure of a space, adjust the lighting, the whites, and the blacks to make a room pop with natural accents.
Next, work with the saturation of the room. Collaborate with the tint and colors of a space to put the property in the best view possible. Real estate photo editing should enhance the view of an area by focusing on improving the color and lighting but, be wary of oversaturation and overexposure.
Remove Lens Distortion
Lens distortion is a malformation on the edges of an image distorted by a lens. This distortion causes bends and curves in places that were otherwise straight in an image. There are many types of distortions, but the most common in real estate photo retouching are barrel, pincushion, mustache, and keystone distortions.
These distortions are common in real estate photography, and the easiest way to remove them is in Adobe Lightroom. In Lightroom, select the Develop section’s Lens Profile Correction tool, and it will automatically fix the distortions. If this fails to work, the manual functions are always useful in correcting an image.
Mask Polarized Images for Reflections
A photographer makes the editing process a lot simpler when editing reflections out of an image. The editor combines two photos from the photographer to remove glares and shine so that an image has little to no reflections. This gives an image an authentic and rich coloring with accents on details on various surfaces.
Remove Distractions
The image’s central point should be the home’s beauty, and any extra items in an image distract from this idea. Clutter and extraneous items like toys or cords make an image look unfocused and take the eye away from the property.
The most straightforward solution is to remove the image’s distracting parts by masking or cloning the image. Blending and a bit of elimination can make all the difference in the appearance of an image. Doing this makes a picture appear clean and uncluttered without taking any benefit out of the space.
Touch Up With Care
Real estate photography editing puts a lot of power in the hands of the editor. An excellent real estate photo editor will learn to touch up with care. The edited home should be recognizable and realistic after the editing process.
If a home has a large hole in the wall that isn’t going to be fixed before a buyer moves in, the hole probably shouldn’t be patched up in the editing process. The editor’s responsibility is to emphasize and highlight a home’s beauty without virtually restoring a house.
Work with Warmth and Sharpness, Not Against It
The warmth and sharpness of a room give a comfortable ambiance to the person viewing a photo. By restoring the original white balance of a space, the editing can make a room look even and clean by merely working with the light.
A crisp and sharp image never fails to impress the eye. Removing the noise and sharpening different aspects of the room makes the appearance of a space appear more professional and liveable.
Straighten and Line-Up the Image
The perspective of an image is essential in displaying the symmetry and chemistry between rooms in a home. Uniformity of lines within an image helps create a distinct flow to a space. This can be adjusted by simply moving the level and vertical lens correction options in Adobe Lightroom. The Transform settings in Lightroom can assist in creating symmetry in an image.
Change the Sky
Taking images of a real estate property can prove to be difficult when the weather doesn’t want to work with the photographer. Natural light shining on a property when the sun is out can help an image pop which will need minimal color correction later on.
A cloudy day puts a level of dreariness in an image and takes away from that beautiful natural light. With real estate photo enhancement, an editor can take out the sky from a gloomy day and add a perspective that looks like it was shot on the sunniest of days. When changing out the sky, an editor should make sure that the vibrancy and angles of the light match with the light of the sky edited in.
Real Estate Photo Editing Works with the Natural Look
The most significant part of real estate photo editing is to work with the real and natural aspects of a home. Over manipulation and editing can make a space feel false to a buyer. The edit of an image should work with the style of the photographer and the style of the home to make the property feel liveable and realistic. Half of the photo is photography, and the other half is retouching.